Life on the road doesn’t mean you have to give up reliable internet. For RVers craving fast, dependable broadband in remote campsites or Boondockers’ paradises, Starlink has become a go-to solution. But installing Starlink on a mobile home comes with its own set of challenges and opportunities. In this article, we’ll walk through everything you need to know about navigating an RV Starlink installation, from mounting options to wiring, power management, and real-world tips from seasoned travelers.
Why Install Starlink in an RV?
RV Starlink installation opens up a world of possibilities for remote work, streaming, and staying in touch. Traditional cell service often struggles in rural or wooded areas, and mobile hotspots may be limited in bandwidth or signal strength. Starlink allows RVers to tap into low-earth-orbit satellites for internet speeds that rival or exceed many traditional ISPs. That means you can work, watch your favorite shows, or plan future trips without interruptions, even when you’re miles from the nearest town.
Planning the Installation: What to Consider First
Before you mount anything, good planning will save you headaches. Start by using Starlink’s obstruction checker tool to identify a clear patch of sky. Starlink needs an unhindered view toward the northern sky to maintain a strong connection.
Then, think about power. RVs often run on a mix of solar, shore power, and battery systems. Since the Starlink router draws a constant load, many RVers install a switch so they can turn the system on only when needed to conserve energy. Finally, determine your best mounting surface and sketch out your cable and power routing to keep everything safe and weatherproof.
Mounting Options: Where to Put “Dishy”
When it comes to mounting the Starlink dish, often called “Dishy,” RVers use several common methods depending on whether they want a temporary or permanent setup.
- Tripod Stand or Ground Mount: The included four-leg stand is simple and portable. It avoids drilling and works well for travelers who frequently change locations.
- Ladder Mount: Many RVers attach a pole to their ladder using a flagpole adapter, then mount Dishy on top. This gives added height without roof drilling.
- Roof Mount (Pivot or Fixed): Those wanting a fully permanent setup often choose a secure roof mount. Pivoting or swivel mounts allow easier dish alignment. For full-timers, there are in-motion options designed to hold the dish securely while driving.
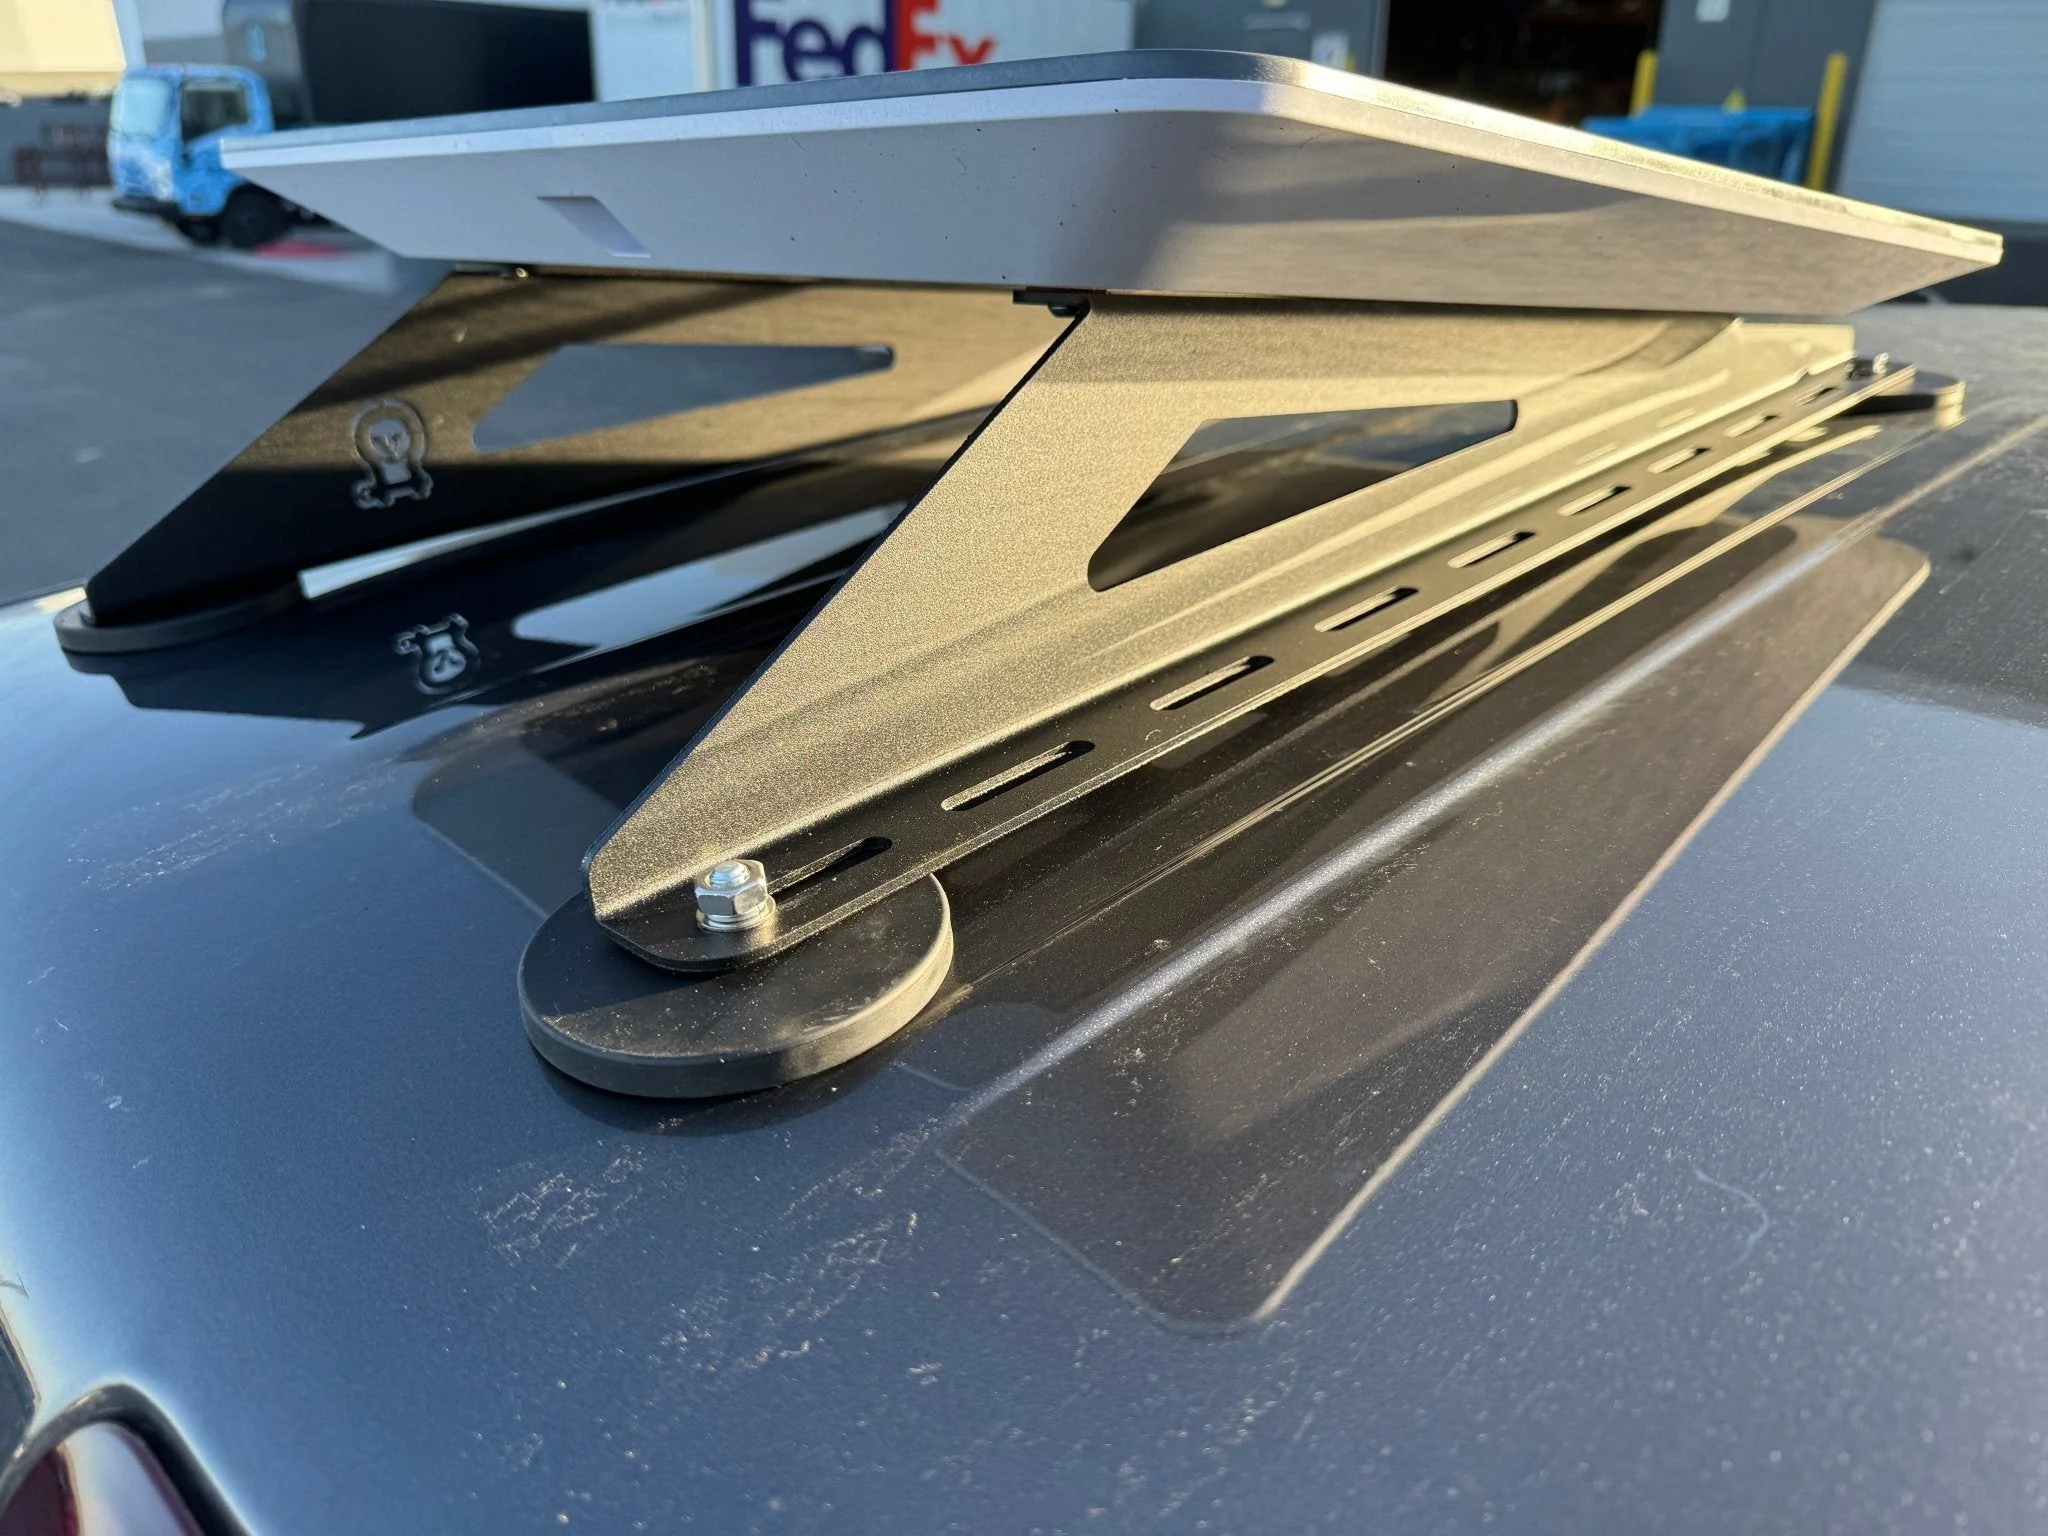
- DIY Solutions: Some RVers get creative with PVC pipe, speaker stands, or retrofitted antenna mounts. Magnetic mounts paired with ladder hardware are also popular. Regardless of method, always ensure the dish is stable and remove or secure it before driving.
Wiring and Power Setup
Once mounted, the next step is wiring. Starlink uses a single cable carrying both data and power. Many RVers run the cable through a small sealed opening in the RV wall or via an existing entry port.
Since the system draws continuous power, it is smart to install an interior switch so you can power the router only when you need it. If your RV runs mostly on solar or batteries, this small change can significantly extend your available energy.
Installation Safety and Best Practices
Safety is critical when working on an RV roof. Make sure your mount is structurally strong enough to handle wind and movement. Use stainless steel hardware and a marine-grade sealant if you need to drill into the roof.
The dish should have a slight tilt so water and debris can slide off easily. Also consider nearby equipment like air conditioners or solar panels that could block the line of sight. Weatherproof all ports and cables carefully to avoid water damage.
Configuring and Testing Your Connection
After the physical setup, plug in the power supply and router. Use the Starlink app to complete the system setup and run the alignment tool. It may take 10 to 20 minutes for the dish to fully initialize and acquire a satellite lock.
Once connected, run a speed test to confirm your performance. If speeds are lower than expected, test for obstructions or try repositioning the dish.
Troubleshooting Common Issues
Even well-planned installations encounter minor issues:
- Obstructions: Trees or other RVs can interrupt service. Raising the dish or moving your vehicle can help.
- Power Drain: If your batteries run low quickly, make sure your switch is installed so the router can be turned off when not needed.
- Intermittent Drops: Loose connections or poor weatherproofing can cause drops. Recheck all seals and cable fits.
- Traveling with Dishy: For removable setups, always store the dish before driving to prevent wind damage.
When to Call a Pro
Many RVers complete the installation themselves, but professional help can be useful if you are uncomfortable drilling into your roof, unsure about electrical wiring, or want a fully integrated in-motion mount. A pro can ensure the installation is secure, leak-proof, and properly aligned.
Real-World Lessons from Full-Time RVers
Experienced RVers share common tips:
- Ladder mounts are popular because they avoid roof drilling.
- Permanent roof mounts look clean but require removing or securing the dish before hitting the road.
- Some travelers run the cable temporarily through a window to avoid modifying the RV.
- A taller mount often helps reduce obstruction errors, especially in forested sites.
Conclusion: Why RV Starlink Installation Is Increasingly Worth It
With thoughtful planning and the right installation method, RV Starlink installation can dramatically improve life on the road. You gain access to fast, dependable internet in places where traditional service simply doesn’t reach. Whether you’re working remotely, staying connected with family, or streaming your favorite shows under the stars, Starlink allows you to travel freely without sacrificing connectivity.
Whether you choose a DIY approach or hire a professional, the freedom and reliability of satellite-based broadband make this upgrade one of the most impactful improvements for modern RV travelers.


